

The Tools tab holds the output fixes that go into the print-ready file, and three tools for checking the page. For a file opened from Files, it starts with the image's size and resolution, or a PDF's scale (see Size and resolution).
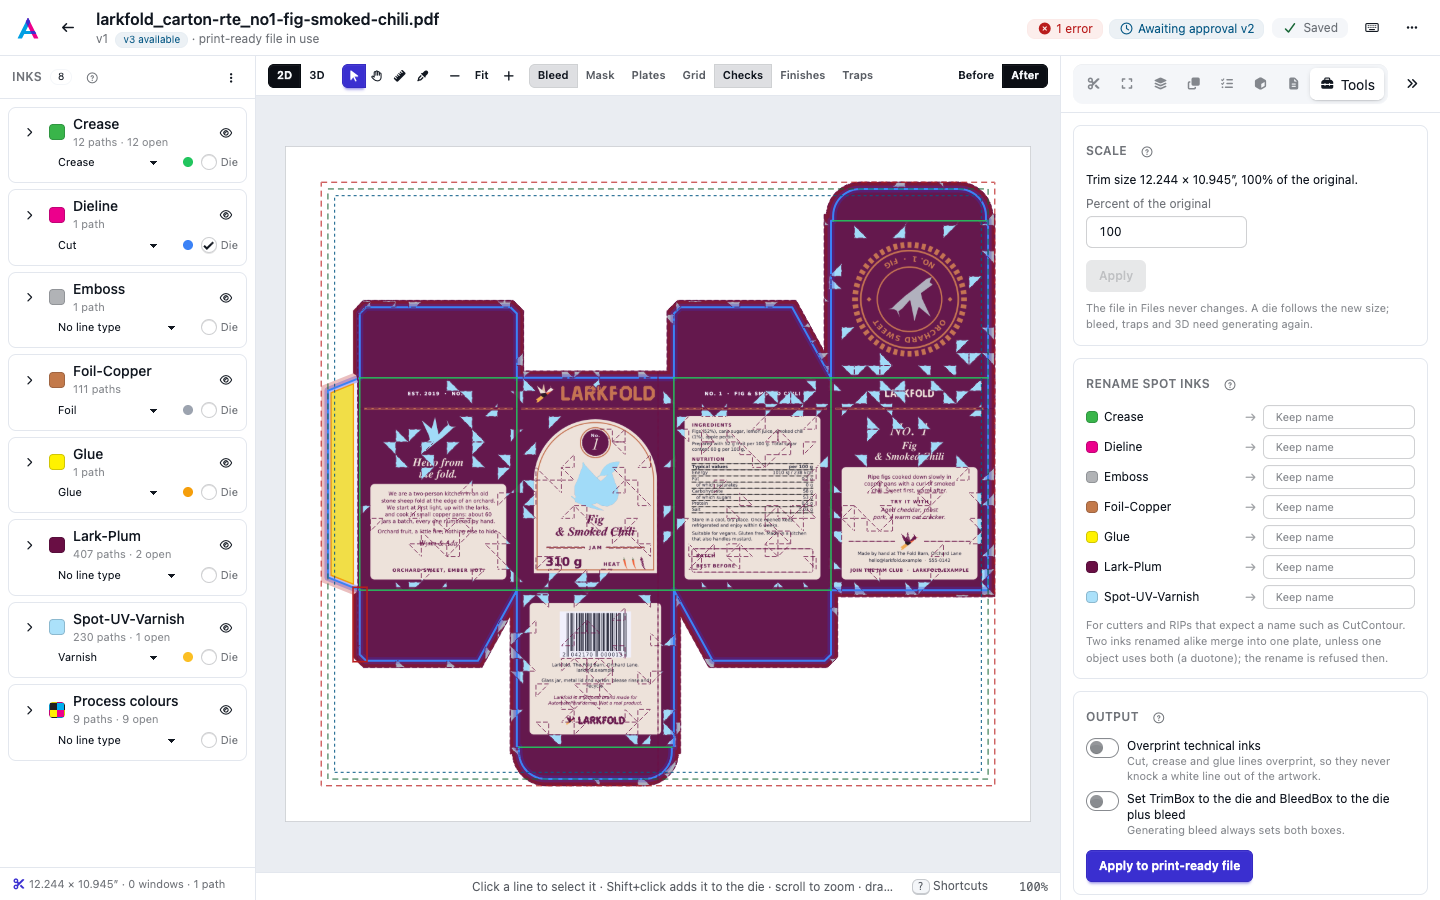
Rename spot inks#
Cutters and RIPs often expect a spot colour of a certain name, such as CutContour for the cut line. Type a new name next to any spot ink, or pick one of the suggestions: CutContour, Thru-cut, Kiss-cut, Crease, Perforation, Varnish, White. Leave the field empty to keep the name.
Two inks renamed alike merge into one plate. When one object uses both inks together (a duotone, or an image in two spot colours), they can't be merged, and the rename is refused with a message naming the inks. At most 50 inks can be renamed.
The rename happens in the print-ready file. The editor keeps using the original names, so line types, finishes and trapping settings stay with their inks.
Output#
Two switches fix the print-ready file for output: technical inks that overprint, and page boxes set from the die.
- Overprint technical inks
- Cut, crease and glue lines are set to overprint, so they never knock a white line out of the artwork. This is the fix preflight offers for knocked-out technical inks (see The Preflight tab).
- Set TrimBox to the die and BleedBox to the die plus bleed
- Writes the page boxes from the die without generating bleed. Generating bleed always sets both boxes. This needs a die.
Renames and these switches take effect when you press Apply to print-ready file; until then the tab shows Not applied yet. Applying needs a die, so renames and overprint need one too (see The die). Applying makes the print-ready file again from the original, keeping the bleed the file in use has. Like generating bleed, a large file is made in the background. When the print-ready file already exists, changing any of these marks it Out of date (see Bleed and the print-ready file).
Safe area#
A safe area is the zone inside the trim where text and logos are safe from the cut. Type an Inset from the trim (it starts at 9 pt, 1/8 in) and the page shows it as a dashed line; leave it empty for none. It is measured in from the die's box (the trim box when there is no die). It is only a guide: nothing in the file changes. The API returns it as the artwork's safe box (see Prepress API).
Measure#
Press Measure (or M) and drag on the page. The distance shows in the tab and in the status bar, in the job's unit. Esc clears the measurement; V goes back to selecting.
Ink at a point#
Press Sample (or I) and click the page. The tab lists every plate at that point, in percent, and the Total ink: the sum of the printing plates, which you compare with your press's total ink limit. Technical plates are listed but not counted. The values are read from the separations over a 1 pt square, as printed (overprint included), from the file on screen (Before or After). Esc clears the reading.