

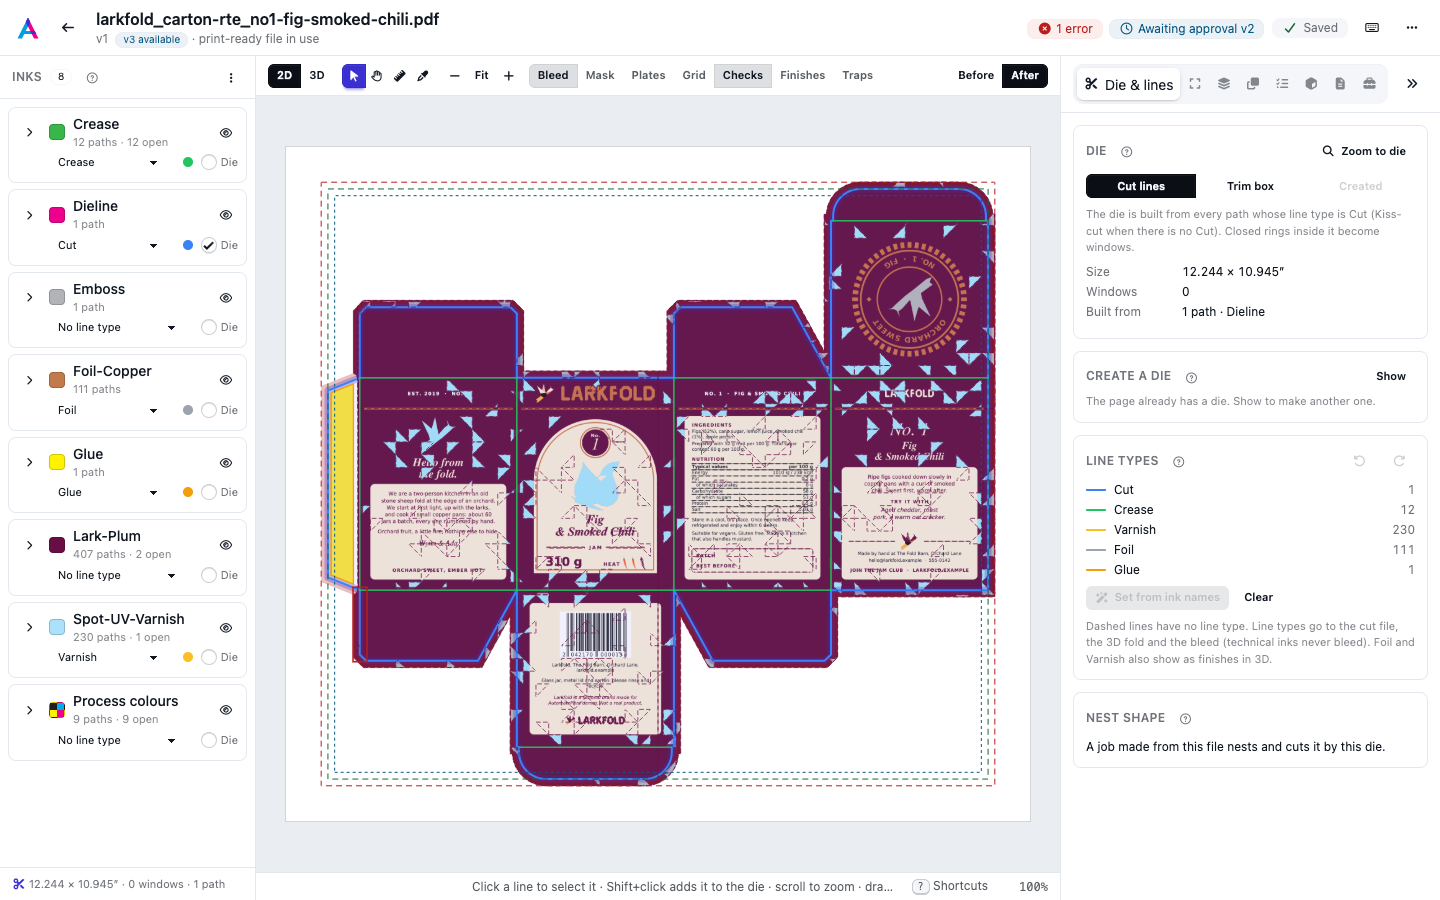
The die is the outline the piece is cut out along. The editor builds it from the lines of the file, shows it on the page, and uses it for the nest, the cut file, the bleed and the 3D fold. The Die & lines tab shows where it comes from and what is wrong with it.
Where the die comes from#
The die comes from the cut lines, from the trim box, or from the paths you tick. The two buttons at the top of the tab, Cut lines and Trim box, choose the first two; ticking paths gives the third.
- Cut lines
- The default. The die is built from every path whose line type is Cut (or Thru-cut). When nothing is Cut, the Kiss-cut (or Partial cut) paths are used instead. Set line types in the Line types tab first (see Inks and line types).
- Trim box
- For flat work cut square, such as cards, flyers and labels: the die is a rectangle, the page's trim box. Type a Width and Height to use another size around the same centre; Reset goes back to the trim box.
- Paths ticked as Die
- Tick Die on an ink card, or In the die on single paths, or Shift + click lines on the page. The die is then exactly those paths, whatever their line type. Choose Cut lines to go back.
- Created
- For a file from Files (an image, or a PDF without cut lines): a die made under Create a die from a shape, a traced contour or a drawn outline. See Create a die.
The paths of the die are joined where their ends meet (ends up to about a quarter of a point apart are closed). The outer boundary is the die; closed rings inside it are Windows, cut out of the piece. Cut lines that end inside the die without closing, such as the lock slits beside a tuck flap's crease, stay knife cuts: they don't change the outline, and the 3D fold keeps turning on the crease beside them.
Dielines from a generator#
A dieline PDF made by a dieline generator is read like any other file: map its cut ink (such as Dieline) to Cut
and its crease ink to Crease, or let Set from ink names do it. When the PDF also carries fold data (an attached
dieline.json file), the 3D tab folds the carton the way the dieline says: each crease's direction and angle, the
order of the folds, the base panel, the flat-glued angles and the board. See The 3D carton.
The Box designer makes such dielines, with fold data, from a box style and its sizes (see Dieline files).
What the tab shows#
Under the buttons you see the die's Size, its number of Windows and what it is Built from, and Zoom to die frames it on the page. The foot of the Line types tab repeats a one-line summary.
The Line types section lists every line type in use with its colour and number of paths, with Set from ink names and Clear, and undo and redo for line-type and die changes. Clear also removes path overrides and sets the die back to Cut lines.
When there is no die#
The tab says what is missing instead of guessing:
- No die: map an ink or path to Cut, tick the paths of the die, or use the trim box. Nothing is Cut or ticked yet.
- The die lines do not close into an outline. The cut lines leave a gap. Show where the line is open zooms to the first open end; fix the file, or give a stray path another line type.
- Some selected die paths no longer exist. The ticked paths are no longer among the artwork's paths. Read the file again: ticked paths that are gone are dropped, and the die goes back to Cut lines when none are left.
- No cut line: for flat work cut square, use the trim box as the die. The page has no cut line and looks like flat work; Use trim box makes the trim box the die.
- The die is the whole page. The die found is as big as the page. If the product is smaller, map its own cut line instead.
When the cut lines make several separate outlines, the largest is the die and the tab says how many were ignored.
Nest by the die#
The Nest shape section says how the job nests this artwork. When it is nested by its die, pieces are placed by their real outline and the cut file cuts the die.
An artwork the job nests by another shape (its trim box, a custom size or a pixel contour) keeps that shape while you set crease, glue and other line types. It switches to the die when the die itself changes, or when you press Nest by this die. See Jobs and artwork for the shapes.
A file opened from Files has no job yet: the section says that a job made from the file nests and cuts it by this die (see Files and images).
Everything that follows the die#
- The nest and the cut file, when the artwork is nested by its die (Cutting files and registration).
- Bleed: the bleed band is drawn around the die (Bleed and the print-ready file).
- The safe area, measured in from the die's box (The Tools tab).
- 3D: the carton's panels are the die cut up by its creases (The 3D carton). 3D needs a die. A dieline's fold data is matched to the creases of the die you set here.
- Page boxes: the print-ready file's TrimBox is the die's box (The Tools tab).
The sheet outside the die#
When the page has a die, the editor hides the sheet outside the piece as soon as the file opens. That edge is the outer cut contour, the outline that holds the artwork, not a smaller path selected inside it. Notes, colour bars and other artwork that sit on the sheet but not on the piece stay out of the way. If a bleed is set, that edge is the contour plus the bleed, not the trim alone. Drag the Outside slider on the toolbar to show the rest of the sheet: the hidden end shows only the piece and its bleed. The die line, the bleed band and the guides stay on screen either way. The choice stays while you work on this file; opening another file starts hidden again. A file with no die is not clipped, and the slider is not shown.