

Mark sets live in the library under Equipment › Marks. The library has three tabs: Mark sets, Assets (logos, images and fonts your marks use, see Assets) and Fields (the order data your marks can print, see Order data in marks).
Open Equipment, then the Marks tab.
Start from a preset#
New mark set opens the preset gallery. Start from Blank, or from a preset your equipment suggests. A preset is copied into your library, so you can change it freely.
| Preset | What it places |
|---|---|
| Zünd corners | Registration dots at the corners of the artwork bounds, with one off-pattern dot so the camera finds the sheet's direction |
| Zünd roll: sides every bed | Registration dots down both side margins, at least three per bed, with a bed label |
| Zünd rigid: outside every 5 ft | 8 mm registration dots on the outside of the layout only, at most 5 ft (1,524 mm) apart, including every corner, plus one off-pattern dot. Nothing is placed inside the work |
| Zünd flexible: through the layout | Registration dots along both sides (at most 250 mm apart) and through the free space of the layout (at most 300 mm apart), for flexible material |
| Kongsberg nested | Four corner marks plus an off-pattern mark, and a Code 39 barcode of the cut file name |
| Slug line | One line of text in the bottom margin: job, customer, PO, sheet number, printer and time |
| Item labels | A small label under each copy: item name, PO and copy numbers, with an optional code |
| Crop marks | Trim marks at the corners of each copy |
| Colour bar | CMYK steps and the job's spot inks in the lead-in or the left margin |
| Cutter job barcode | The sheet's job code, as the cutter reads it |
| Scan-to-open QR | A QR code that opens this job and sheet in the app |
| Roll ruler | A ruler down the side of a roll with a label every metre |
| Sheet counter | A stepped bar on the edge, so a stack of sheets shows a diagonal line |
| Underside QR (Kongsberg USC) | The codes and dots a Kongsberg underside camera reads |
Presets that need a particular cutter (Zünd, Kongsberg) say so. A job with that set and no such cutter shows "This mark set needs a … cutter on the job." until you pick one.
Each card in the library shows a thumbnail, the number of marks, where they go (sheet, roll, item), what they output (print, register) and where the set is used. The ⋯ menu opens, duplicates, exports, archives or makes the set the team default. Import mark set… reads a set exported from another team.
The designer#
Opening a set shows the designer: the marks down the left, a live preview in the middle and the selected mark's settings on the right. Preview on switches the preview between a sample sheet, a sample roll, a 1-up or one of your real jobs and layouts, so you see real names, codes and positions. Changes save as you go, and every save keeps a version you can go back to (History…).
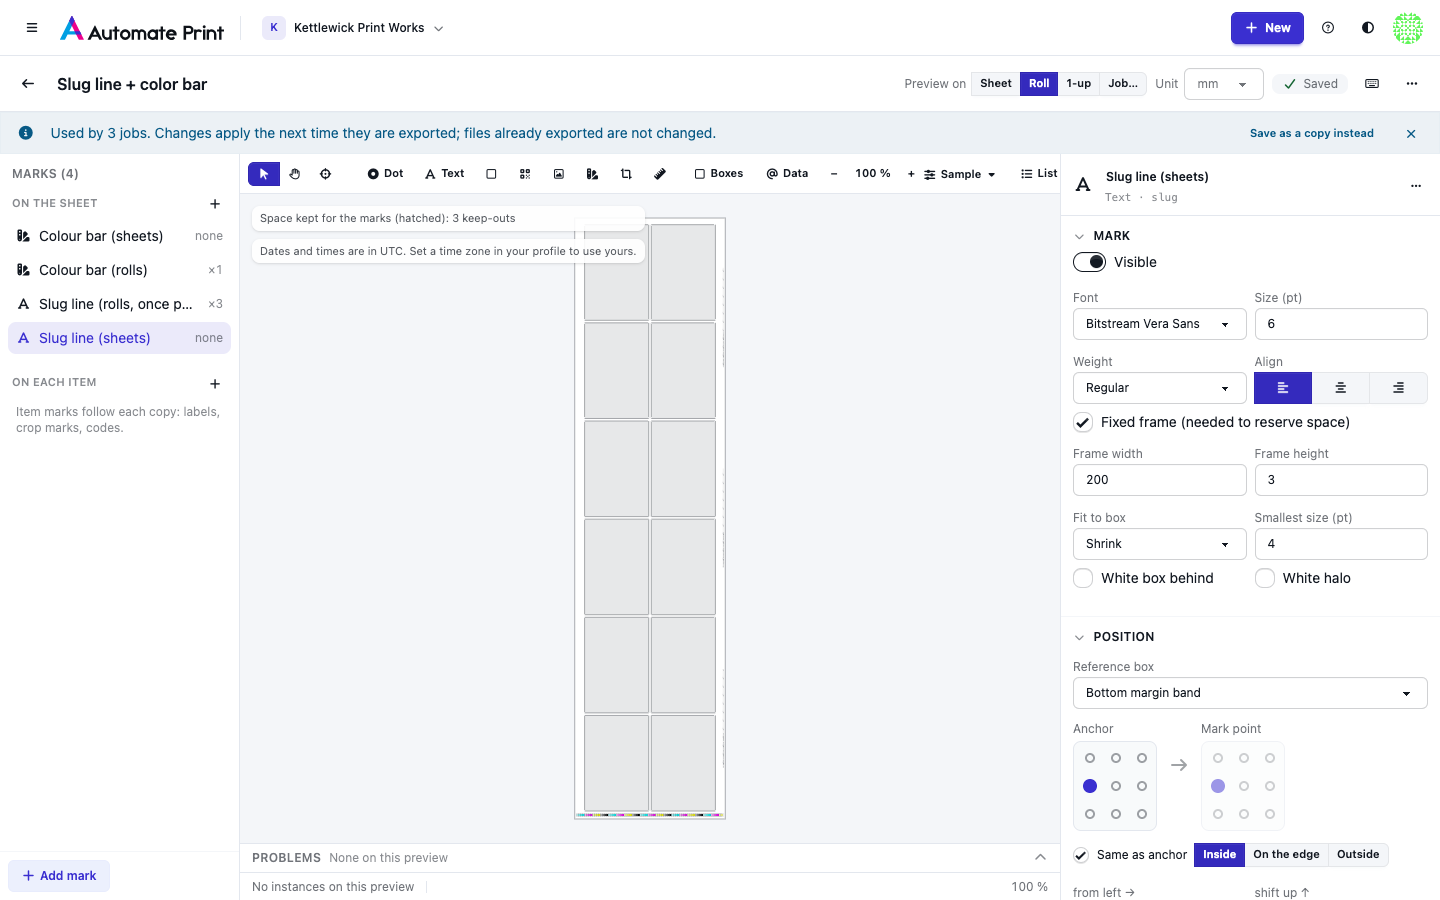
- The toolbar adds marks: a dot, text, a rectangle, a barcode, an image, a colour bar, crop marks or a ruler.
- Boxes outlines the reference boxes; Data shows field names instead of values; List shows every placed mark as a table.
- A set used by jobs shows how many. Changes apply to their next export; files already exported don't change.
Place a mark#
Each mark has a Reference box, an Anchor (one of nine points of the box), a Mark point (which of the mark's own nine points sits on the anchor) and an inset that moves it inward. Reference boxes are the media, the printable area, a margin, the lead-in or lead-out of a roll, a bed window, the artwork bounds, or, for marks on each copy, its trim, bleed, die or safe area.
Repeat turns one mark into many: at the corners, along an edge (by spacing or count, optionally once per bed), in a grid, next to each copy, or scattered through the free space. Rotate keeps a mark at a fixed angle, turns it with the item, keeps it upright, or reads it along the roll.
If blocked by artwork decides what happens when a mark would land on a piece: Slide along the edge, Skip this one, Place anyway or Stop with an error. An edge or bed repeat can ask for At least per bed: a bed with fewer marks stops the export, because the cutter could not register it.
When limits a mark to some jobs, such as rolls only, one printer, or orders with a rush flag. See Order data in marks.
Output#
- Print (imposed PDF) draws the mark on the artwork, in black (K100), registration, CMYK, a spot colour, white, or your team's marks spot colour. Overprint and White box behind keep marks readable on any background.
- Cut puts registration marks into the cut file on the cutter's registration layer (see Cutter registration and job codes).
- Proof only never reaches production files.
- Reserve space in the nest keeps the space free before nesting. Automatic reserves registration marks, required marks and marks in the margins; see How print marks work.
Assets#
Assets are the logos, images and fonts that image marks and text marks use. Each has a key (such as logo-mark)
that marks refer to, so replacing an asset's file updates every mark that uses it, on their next export.
- Choose files or drop files on the Assets tab to upload PNG, JPEG, PDF (or an Illustrator file saved with PDF compatibility), SVG and TrueType fonts (TTF), up to 20 MB each. Uploads are kept in Files, in the Marks folder, and count toward your team's storage like any other file.
- Add from Files opens the Files picker: choose one or more files you already have. The asset uses that exact version; nothing is copied, so it costs no extra storage. The key and the name come from the file's name.
- Replace uploads a new file for the asset; From Files points it at another file from Files. The key stays the same.
- Delete removes the asset only. Its file stays in Files.
Each card shows the size in pixels and the resolution at 25 mm wide (Low resolution under 150 ppi), how many marks use it, and Files · v3: the version it uses (hover to see where the file is). A new version of that file in Files doesn't change the asset until you pick it with From Files.
A file that an asset uses can't be deleted from Files: in the trash it is kept until the asset lets go of it (see Files). Images over 48 megapixels, PDFs without pages and fonts whose licence doesn't allow embedding are refused before anything is stored. An SVG is turned into a PDF for printing; the SVG itself stays in Files.