A banner, wall graphic or wrap that is wider than your printer is printed in tiles: pieces that overlap a little so you can lap one over the next when you mount them. In the 1-up editor, Tiling on the Tools tab splits the page into tiles, writes one PDF page per tile and makes a report that shows how the tiles go together.
The page's trim box is what gets tiled (the whole page when it has none), from the file in use: the print-ready file when there is one.
Tile the graphic#
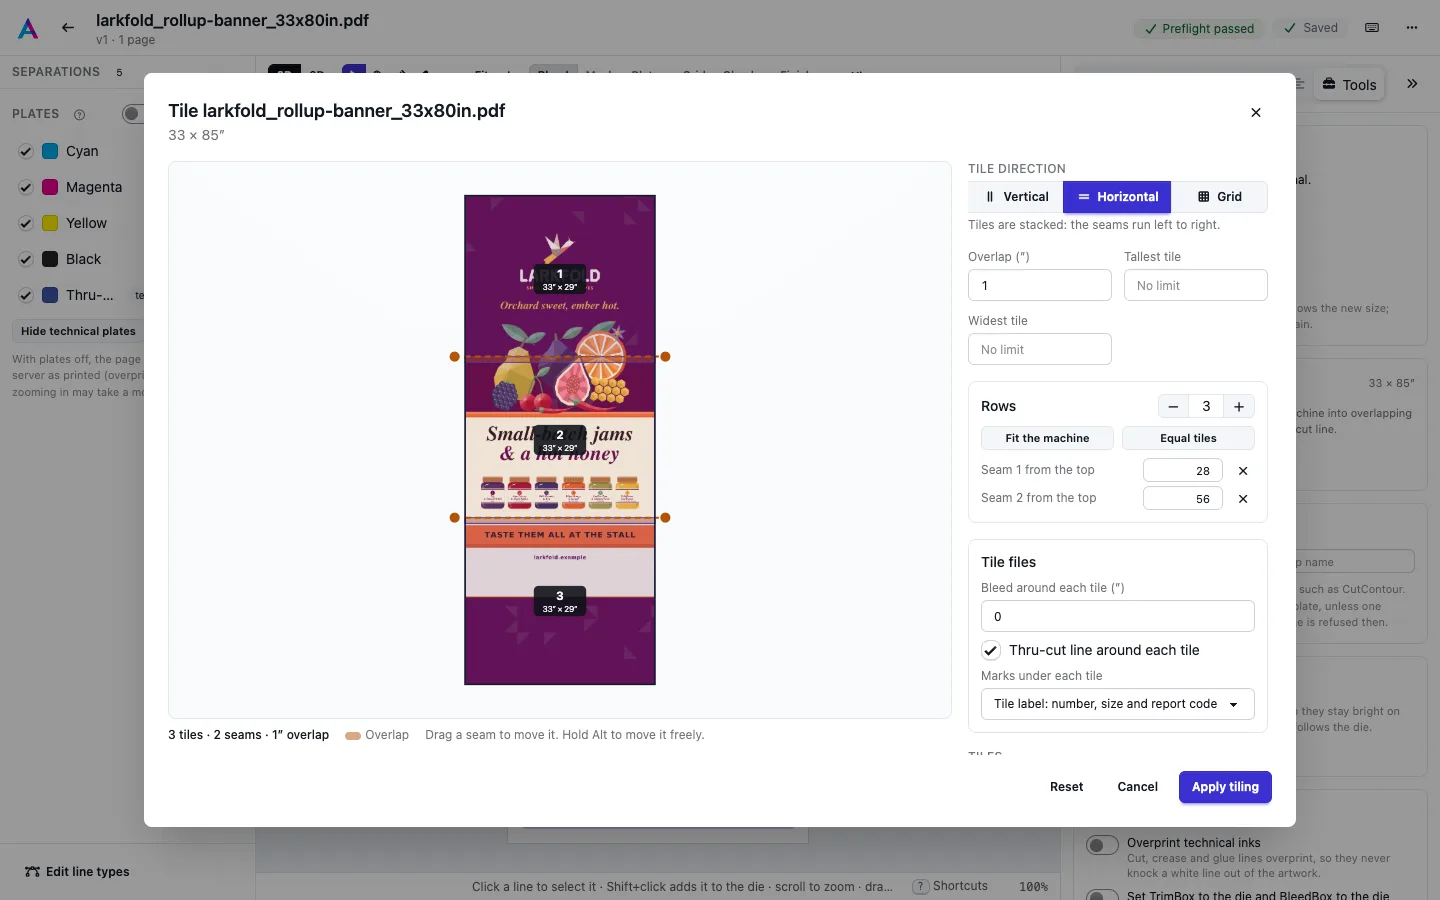
Press Tile this graphic…. The tiling editor opens on a picture of the graphic.
- Pick the tile direction. Vertical puts the tiles side by side, so the seams run top to bottom. Horizontal stacks them, so the seams run left to right. Grid cuts both ways.
- Type the largest tile your machine takes: Widest tile for vertical tiles, Tallest tile for horizontal ones, both for a grid. The editor remembers them for the next graphic.
- Set the Overlap: the band two neighbouring tiles both print.
The editor then lays out the tiles and numbers them left to right, top to bottom.
Move the seams#
A seam is where the next tile starts. Each seam is a dashed line with a handle at both ends, and the shaded band beside it is the overlap.
- Drag a seam to move it. It snaps to a round position; hold Alt to move it freely.
- Type a seam's position in the list. Positions are measured from the graphic's left edge for columns and from its top edge for rows.
- Use − and + to change how many tiles there are. The tiles are then all the same size.
- Fit the machine makes every tile as large as the machine takes and leaves the remainder in the last one. Equal tiles keeps the number of tiles and makes them the same size.
- ✕ removes a seam.
A tile that is larger than the machine takes is hatched and marked Too large, and Apply tiling stays off until you move its seams closer. Reset goes back to the machine's tiles.
The tile files#
Under Tile files in the editor, choose what each tile's page carries:
- Bleed around each tile
- Extra picture on every side of the tile. Inside the graphic it is the edge of the neighbouring tile. At the graphic's own edge it is the bleed the page has outside its trim box, when it has any.
- Thru-cut line around each tile
- A hairline in the Thru-cut spot colour on the tile's edge, on its own layer, for a cutter to follow.
- Marks under each tile
- Tile label prints the tile's number, the graphic's name, the tile's size and a code that opens the tiling report. Or pick one of your saved mark sets that has item marks (see Mark sets and the designer), or No marks. Marks print in a strip under the tile, outside the bleed and the cut line, so they are trimmed away with the bleed.
Apply tiling writes the files. The Tools tab then offers:
- Download the tile files (PDF): one page per tile, in tile order. Each page's TrimBox is the tile and its BleedBox the tile with its bleed.
- Open the tiling report and Download the report (PDF).
Press Edit tiles… to change the tiling and write the files again. The original file never changes.
The tiling report#
The report is for whoever prints, finishes and mounts the graphic. It shows:
- the finished size, the number of tiles, the overlap and the tile direction;
- a drawing of the whole graphic with every tile numbered and the overlaps shaded;
- the order to mount the tiles in;
- a row per tile with its picture, its row and column, its size, its size with bleed, where it starts from the left and the top, and the tiles it overlaps.
The report has a code to scan. Scanning it, from the printed report or from a tile's label, opens the report's page for a signed-in member of your team. Print prints the page, and Report (PDF) is the same report as a file.